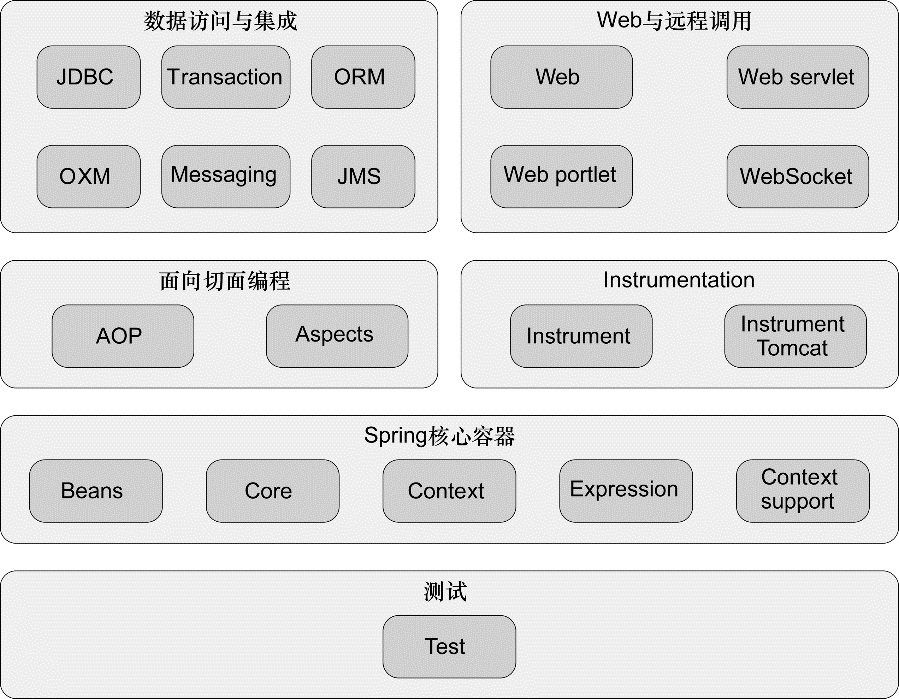
问题
- spring 如何产生Bean
- @Configuration注解的作用是什么,Spring是如何解析加了@Configuration注解的类?
- Spring在什么时候对@ComponentScan、@ComponentScans注解进行了解析?
- Spring什么时候解析了@Import注解,如何解析的?
- Spring什么时候解析了@Bean注解?
如何产生bean
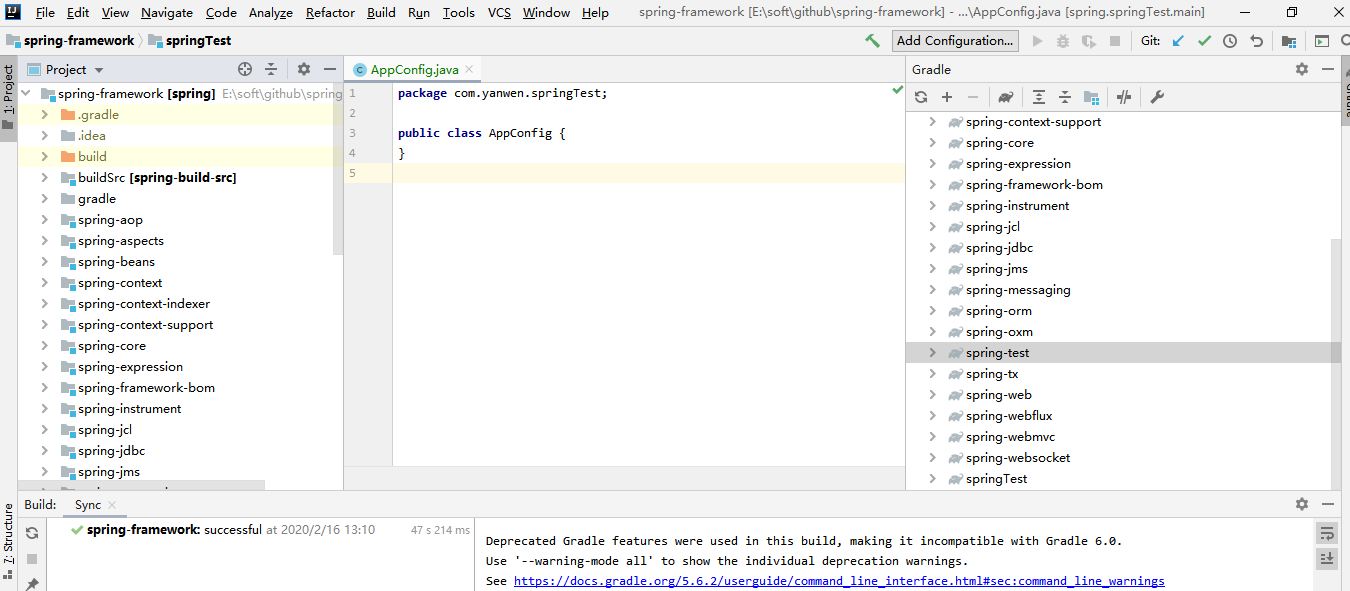
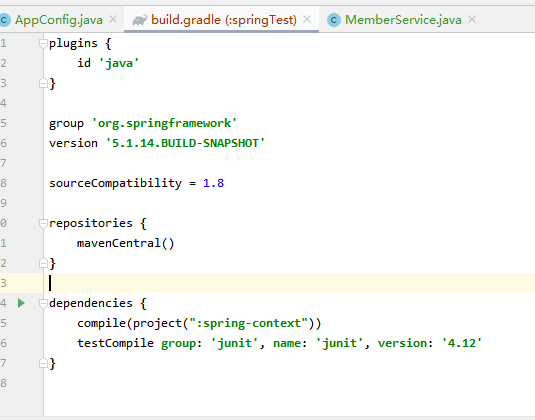
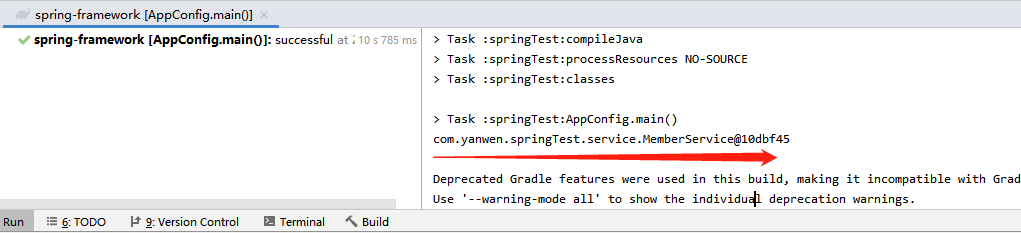
1 | package com.yanwen.springTest; |
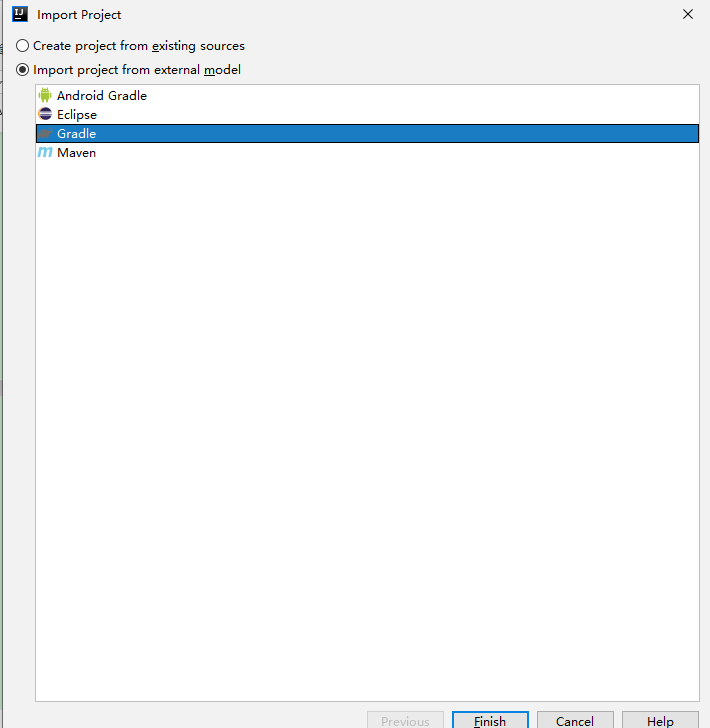
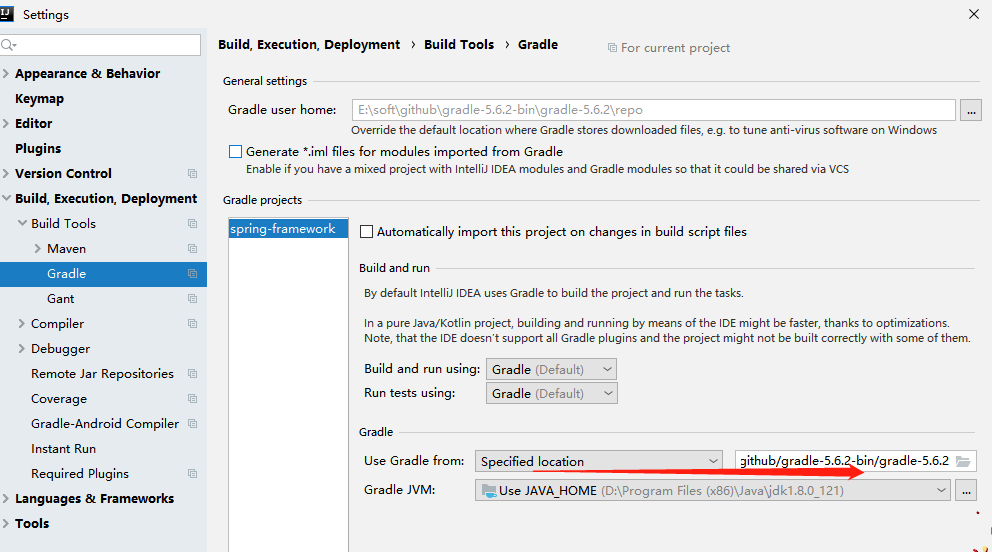
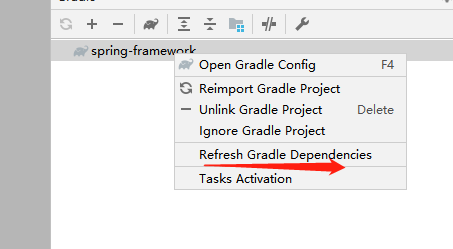
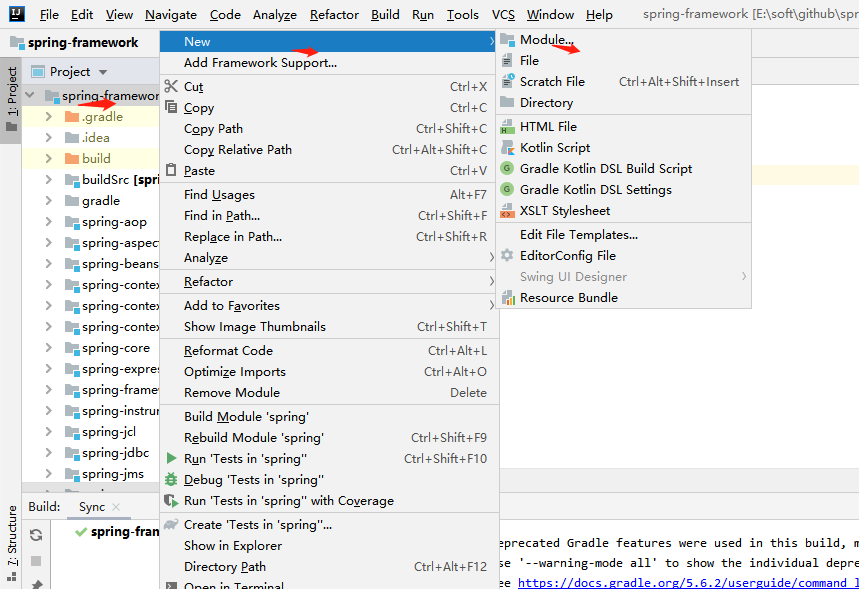
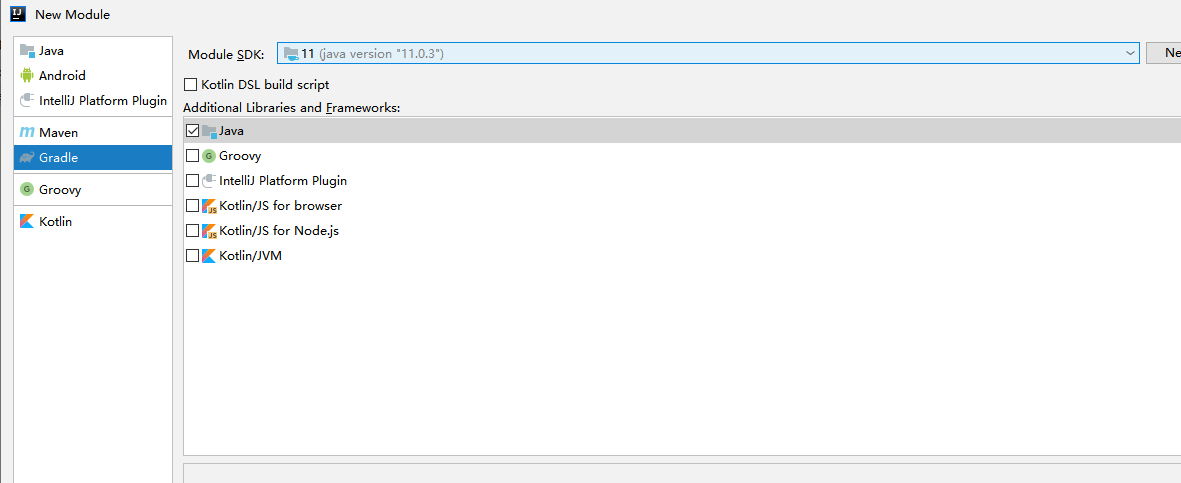
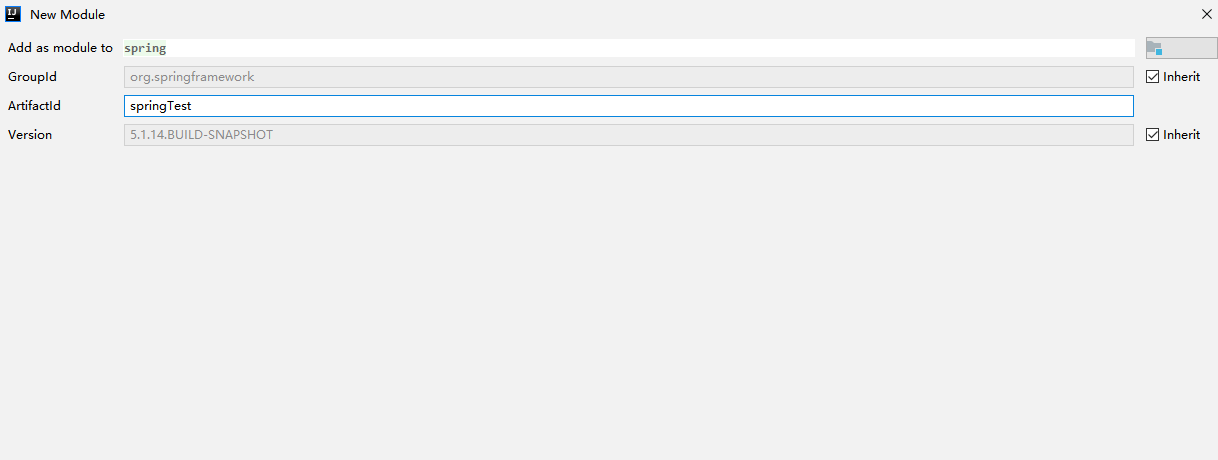
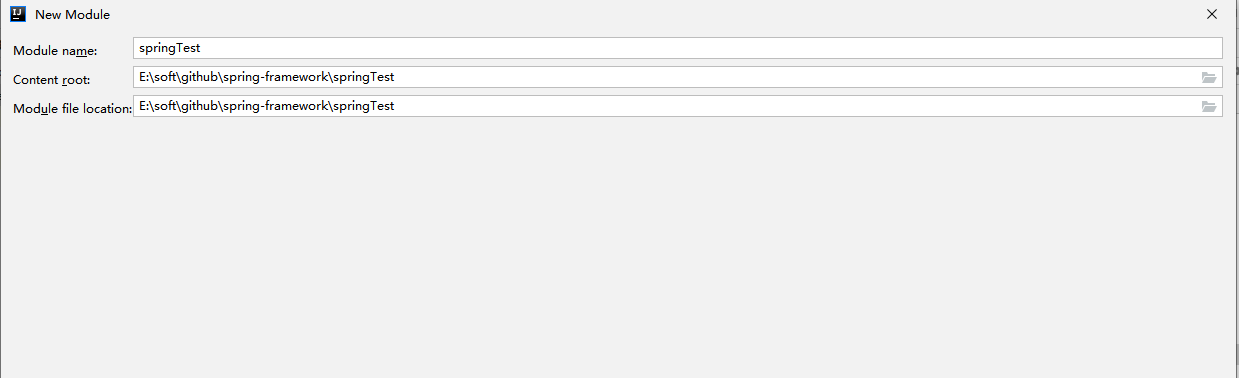
如何在spring源码中新建model及创建上面的代码
关于ApplicationContext
spring实例化过程.png
以上代码:
- 从一个Java的配置类中加载Spring应用上下文(AnnotationConfigApplicationContext)。
- 通过BeanFactory启动IoC容器时,并不会初始化配置文件中定义的Bean,初始化动作发生在第一个调用时。
- 对于单实例(singleton)的Bean来说,BeanFactory会缓存Bean实例,所以第二次使用getBean时直接从IoC容器缓存中获取Bean。
启动过程分析
记住,一定要在电脑中打开源码,不然纯看是很累的。
spring源码注释
分支是springcode
Spring bean 默认是单例
为了弄清楚Bean是怎么来的,花费了大把功夫,现在要把Bean Definition的加载、解析、处理、注册到bean工厂的过程记下来
- AnnotationConfigApplicationContext annotationConfigApplicationContext = new AnnotationConfigApplicationContext(AppConfig.class);
实例化AnnotationConfigApplicationContext(Class<?>… componentClasses- this()
- 调用父类GenericApplicationContext的构造函数
- this.beanFactory = new DefaultListableBeanFactory();
实例化DefaultListableBeanFactory
- this.beanFactory = new DefaultListableBeanFactory();
- this.reader = new AnnotatedBeanDefinitionReader(this);
实例化AnnotatedBeanDefinitionReader - this.scanner = new ClassPathBeanDefinitionScanner(this);
初始化一个扫描器,它仅仅是在我们外部手动调用 .scan 等方法才有用,常规方式是不会用到scanner对象的
- 调用父类GenericApplicationContext的构造函数
- register(componentClasses);
- AnnotatedBeanDefinitionReader 类register 方法
- AnnotatedBeanDefinitionReader的方法doRegisterBean 把appconfig注册至bean容器中但是未实例化
- AnnotatedBeanDefinitionReader 类register 方法
- refresh();
- prepareRefresh();
刷新前的预处理; - ConfigurableListableBeanFactory beanFactory = obtainFreshBeanFactory();
获取BeanFactory;默认实现是DefaultListableBeanFactory,在创建容器的时候创建的 - prepareBeanFactory(beanFactory);
BeanFactory的预准备工作(BeanFactory进行一些设置,比如context的类加载器,BeanPostProcessor和XXXAware自动装配等) - postProcessBeanFactory(beanFactory);
BeanFactory准备工作完成后进行的后置处理工作 - invokeBeanFactoryPostProcessors(beanFactory);
执行BeanFactoryPostProcessor的方法; - registerBeanPostProcessors(beanFactory);
注册BeanPostProcessor(Bean的后置处理器),在创建bean的前后等执行 - initMessageSource();
初始化MessageSource组件(做国际化功能;消息绑定,消息解析); - initApplicationEventMulticaster();
初始化事件派发器 - onRefresh();
子类重写这个方法,在容器刷新的时候可以自定义逻辑;如创建Tomcat,Jetty等WEB服务器 - registerListeners();
注册应用的监听器。就是注册实现了ApplicationListener接口的监听器bean,这些监听器是注册到ApplicationEventMulticaster中的 - finishBeanFactoryInitialization(beanFactory);
初始化所有剩下的非懒加载的单例bean - finishRefresh();
完成context的刷新。主要是调用LifecycleProcessor的onRefresh()方法,并且发布事件(ContextRefreshedEvent)
- prepareRefresh();
- this()
AnnotationConfigApplicationContext构造方法
1 | public class AnnotationConfigApplicationContext extends GenericApplicationContext implements AnnotationConfigRegistry { |
- 调用无参构造函数,会先调用父类GenericApplicationContext的构造函数
- 父类的构造函数里面就是初始化DefaultListableBeanFactory,并且赋值给beanFactory
- 本类的构造函数里面,初始化了一个读取器:AnnotatedBeanDefinitionReader read,一个扫描器ClassPathBeanDefinitionScanner scanner
- scanner的用处不是很大,它仅仅是在我们外部手动调用 .scan 等方法才有用,常规方式是不会用到scanner对象的
- 父类的构造函数里面就是初始化DefaultListableBeanFactory,并且赋值给beanFactory
GenericApplicationContext 构造方法
1 | public class GenericApplicationContext extends AbstractApplicationContext implements BeanDefinitionRegistry { |
DefaultListableBeanFactory 构造方法
默认实现了ListableBeanFactory和BeanDefinitionRegistry接口,基于bean definition对象,是一个成熟的bean factroy。
最典型的应用是:在访问bean前,先注册所有的definition(可能从bean definition配置文件中)。使用预先建立的bean定义元数据对象,从本地的bean definition表中查询bean definition因而将不会花费太多成本。
DefaultListableBeanFactory既可以作为一个单独的beanFactory,也可以作为自定义beanFactory的父类。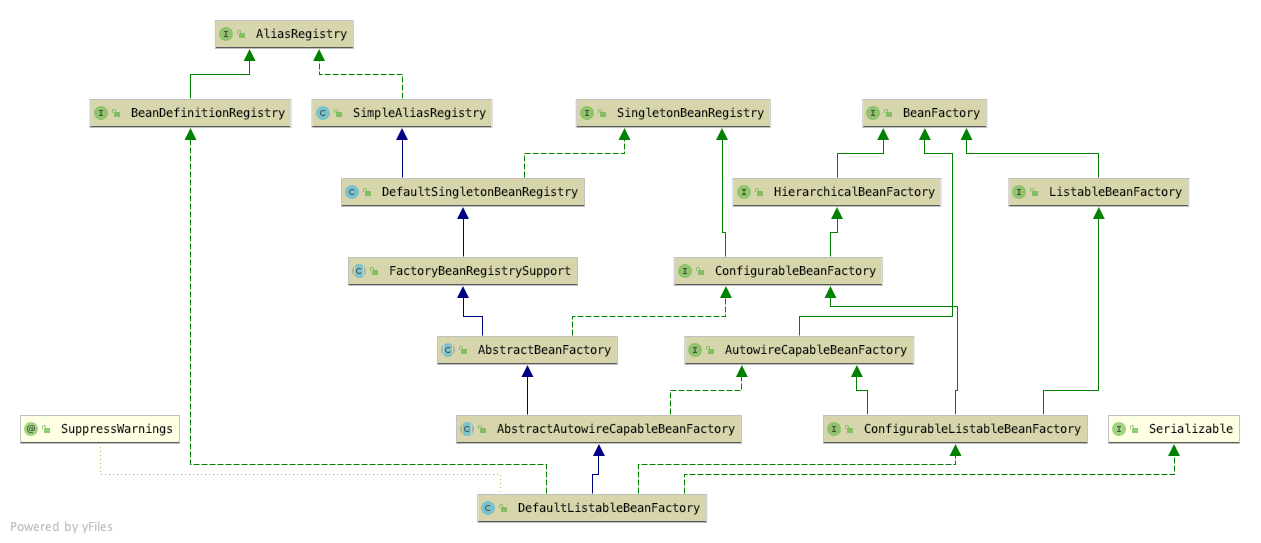
1 | public class DefaultListableBeanFactory extends AbstractAutowireCapableBeanFactory |
AbstractAutowireCapableBeanFactory构造方法
1 | public AbstractAutowireCapableBeanFactory() { |
AbstractBeanFactory
1 | /** |
//初始化一个Bean读取器AnnotatedBeanDefinitionReader
1 | this.reader = new AnnotatedBeanDefinitionReader(this); |
AnnotatedBeanDefinitionReader构造方法
1 | public AnnotatedBeanDefinitionReader(BeanDefinitionRegistry registry) { |
AnnotatedBeanDefinitionReader 方法1
2
3
4
5
6
7
8public AnnotatedBeanDefinitionReader (BeanDefinitionRegistry registry, Environment environment) {
Assert.notNull(registry, "BeanDefinitionRegistry must not be null");
Assert.notNull(environment, "Environment must not be null");
this.registry = registry;
this.conditionEvaluator = new ConditionEvaluator(registry, environment, null);
//让我们把目光移动到这个方法的最后一行,进入registerAnnotationConfigProcessors方法:
this.registry 是 AnnotationConfigApplicationContext的实例了 AnnotationConfigUtils.registerAnnotationConfigProcessors(this.registry);
}
AnnotationConfigUtils.registerAnnotationConfigProcessors
1 | public static void registerAnnotationConfigProcessors(BeanDefinitionRegistry registry) { |
在看registerAnnotationConfigProcessors方法
- 这里会一连串注册好几个Bean,在这其中最重要的一个Bean(没有之一)就是BeanDefinitionRegistryPostProcessor Bean。
* ConfigurationClassPostProcessor实现BeanDefinitionRegistryPostProcessor接口, * BeanDefinitionRegistryPostProcessor接口又扩展了BeanFactoryPostProcessor接口, * BeanFactoryPostProcessor是Spring的扩展点之一, * ConfigurationClassPostProcessor是Spring极为重要的一个类,必须牢牢的记住上面所说的这个类和它的继承关系。 * 除了注册了ConfigurationClassPostProcessor,还注册了其他Bean,其他Bean也都实现了其他接口,比如BeanPostProcessor等。 * BeanPostProcessor接口也是Spring的扩展点之一。
执行完方法
beanDefs 有5个
- ConfigurationClassPostProcessor
- AutowiredAnnotationBeanPostProcessor
- CommonAnnotationBeanPostProcessor
- EventListenerMethodProcessor
- DefaultEventListenerFactory
1
2
3
4
5
6
7
8
9
10
11
12
13
14
15
16
17
18
19
20
21
22
23
24
25
26
27
28
29
30
31
32
33
34
35
36
37
38
39
40
41
42
43
44
45
46
47
48
49
50
51
52
53
54
55
56
57
58
59
60
61
62
63
64
65
66
67
68
69
70
71
72
73
74
75
76
77
78
79
80
81
82
83
84
85
86
87
88// this.registry 是 AnnotationConfigApplicationContext的实例了
source=null
public static Set<BeanDefinitionHolder> registerAnnotationConfigProcessors(
BeanDefinitionRegistry registry, @Nullable Object source) {
//这里返回AnnotationConfigApplicationContext对象中DefaultListableBeanFactory类实例
DefaultListableBeanFactory beanFactory = unwrapDefaultListableBeanFactory(registry);
BeanDefinition if (beanFactory != null) {
if (!(beanFactory.getDependencyComparator() instanceof AnnotationAwareOrderComparator)) {
//用来支持Spring的Ordered类、@Order注解和@Priority注解。
beanFactory.setDependencyComparator(AnnotationAwareOrderComparator.INSTANCE);
}
if (!(beanFactory.getAutowireCandidateResolver() instanceof ContextAnnotationAutowireCandidateResolver)) {
beanFactory.setAutowireCandidateResolver(new ContextAnnotationAutowireCandidateResolver());
}
}
Set<BeanDefinitionHolder> beanDefs = new LinkedHashSet<>(8);
/**
* 注册解析我们配置类的后置处理器ConfigurationClassPostProcessor
* org.springframework.context.annotation.internalConfigurationAnnotationProcessor
*/
if (!registry.containsBeanDefinition(CONFIGURATION_ANNOTATION_PROCESSOR_BEAN_NAME)) {
//如果不存在(当然这里肯定是不存在的),就通过RootBeanDefinition的构造方法获得ConfigurationClassPostProcessor的BeanDefinition,RootBeanDefinition是BeanDefinition的子类
RootBeanDefinition def = new RootBeanDefinition(ConfigurationClassPostProcessor.class);
def.setSource(source);
beanDefs.add(registerPostProcessor(registry, def, CONFIGURATION_ANNOTATION_PROCESSOR_BEAN_NAME));
}
/**
* 注册处理@Autowired 注解的处理器AutowiredAnnotationBeanPostProcessor
*
org.springframework.context.annotation.internalAutowiredAnnotationProcessor
*/
if (!registry.containsBeanDefinition(AUTOWIRED_ANNOTATION_PROCESSOR_BEAN_NAME)) {
RootBeanDefinition def = new RootBeanDefinition(AutowiredAnnotationBeanPostProcessor.class);
def.setSource(source);
beanDefs.add(registerPostProcessor(registry, def, AUTOWIRED_ANNOTATION_PROCESSOR_BEAN_NAME));
}
/**
* 注册处理JSR规范的注解处理器CommonAnnotationBeanPostProcessor
* org.springframework.context.annotation.internalCommonAnnotationProcessor
*/
// Check for JSR-250 support, and if present add the CommonAnnotationBeanPostProcessor.
if (jsr250Present && !registry.containsBeanDefinition(COMMON_ANNOTATION_PROCESSOR_BEAN_NAME)) {
RootBeanDefinition def = new RootBeanDefinition(CommonAnnotationBeanPostProcessor.class);
def.setSource(source);
beanDefs.add(registerPostProcessor(registry, def, COMMON_ANNOTATION_PROCESSOR_BEAN_NAME));
}
/**
* 处理jpa注解的处理器org.springframework.orm.jpa.support.PersistenceAnnotationBeanPostProcessor
*/
// Check for JPA support, and if present add the PersistenceAnnotationBeanPostProcessor.
if (jpaPresent && !registry.containsBeanDefinition(PERSISTENCE_ANNOTATION_PROCESSOR_BEAN_NAME)) {
RootBeanDefinition def = new RootBeanDefinition();
try {
def.setBeanClass(ClassUtils.forName(PERSISTENCE_ANNOTATION_PROCESSOR_CLASS_NAME,
AnnotationConfigUtils.class.getClassLoader()));
}
catch (ClassNotFoundException ex) {
throw new IllegalStateException(
"Cannot load optional framework class: " + PERSISTENCE_ANNOTATION_PROCESSOR_CLASS_NAME, ex);
}
def.setSource(source);
beanDefs.add(registerPostProcessor(registry, def, PERSISTENCE_ANNOTATION_PROCESSOR_BEAN_NAME));
}
/**
* 处理监听方法的注解解析器EventListenerMethodProcessor
*/
if (!registry.containsBeanDefinition(EVENT_LISTENER_PROCESSOR_BEAN_NAME)) {
RootBeanDefinition def = new RootBeanDefinition(EventListenerMethodProcessor.class);
def.setSource(source);
beanDefs.add(registerPostProcessor(registry, def, EVENT_LISTENER_PROCESSOR_BEAN_NAME));
}
/**
* 注册事件监听器工厂
*/
if (!registry.containsBeanDefinition(EVENT_LISTENER_FACTORY_BEAN_NAME)) {
RootBeanDefinition def = new RootBeanDefinition(DefaultEventListenerFactory.class);
def.setSource(source);
beanDefs.add(registerPostProcessor(registry, def, EVENT_LISTENER_FACTORY_BEAN_NAME));
}
return beanDefs;
ConfigurationClassPostProcessor
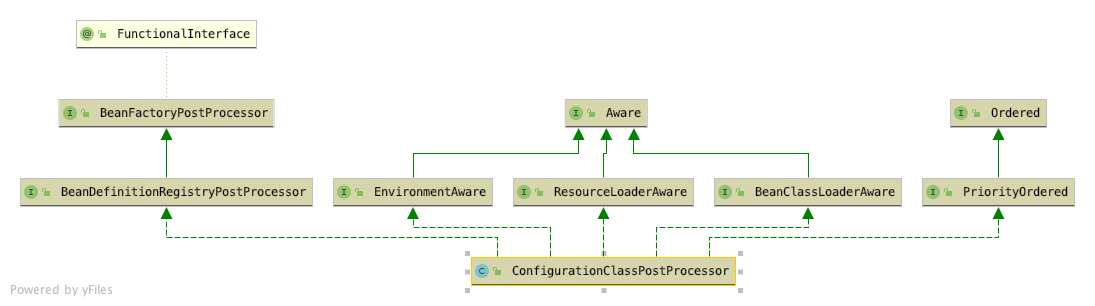
* ConfigurationClassPostProcessor是一个BeanFactory的后置处理器,因此它的主要功能是参与BeanFactory的建造,在这个类中,会解析加了@Configuration的配置类,还会解析@ComponentScan、@ComponentScans注解扫描的包,以及解析@Import等注解。
* ConfigurationClassPostProcessor 实现了 BeanDefinitionRegistryPostProcessor 接口,而 BeanDefinitionRegistryPostProcessor 接口继承了 BeanFactoryPostProcessor 接口,所以 ConfigurationClassPostProcessor 中需要重写 postProcessBeanDefinitionRegistry() 方法和 postProcessBeanFactory() 方法。而ConfigurationClassPostProcessor类的作用就是通过这两个方法去实现的。
* ConfigurationClassPostProcessor这个类是Spring内置的一个BeanFactory后置处理器,是在this()方法中将其添加到BeanDefinitionMap中的
* [postProcessBeanDefinitionRegistry](#PostProcessorRegistrationDelegate-invokeBeanFactoryPostProcessors方法中)调用
1 | registry是DefaultListableBeanFactory对象 |
processConfigBeanDefinitions 方法
- 从Beanfactory找出含有Configuration 或Component或ComponentScan或Import或ImportResource类 目前只有appconfig类符合
ConfigurationClassParser.parse()
解析appconfig(AnnotatedGenericBeanDefinition 定义)1 处理内部类
2 处理@PropertySources注解:进行一些配置信息的解析
3 处理@ComponentScan注解:使用ComponentScanAnnotationParser扫描basePackage下的需要解析的类(@SpringBootApplication注解也包括了@ComponentScan注解,只不过basePackages是空的,空的话会去获取当前@Configuration修饰的类所在的包),并注册到BeanFactory中(这个时候bean并没有进行实例化,而是进行了注册。具体的实例化在finishBeanFactoryInitialization方法中执行)。对于扫描出来的类,递归解析
4 处理@Import注解:先递归找出所有的注解,然后再过滤出只有@Import注解的类,得到@Import注解的值。比如查找@SpringBootApplication注解的@Import注解数据的话,首先发现@SpringBootApplication不是一个@Import注解,然后递归调用修饰了@SpringBootApplication的注解,发现有个@EnableAutoConfiguration注解,再次递归发现被@Import(EnableAutoConfigurationImportSelector.class)修饰,还有@AutoConfigurationPackage注解修饰,再次递归@AutoConfigurationPackage注解,发现被@Import(AutoConfigurationPackages.Registrar.class)注解修饰,所以@SpringBootApplication注解对应的@Import注解有2个,分别是@Import(AutoConfigurationPackages.Registrar.class)和@Import(EnableAutoConfigurationImportSelector.class)。找出所有的@Import注解之后,开始处理逻辑:
遍历这些@Import注解内部的属性类集合
如果这个类是个ImportSelector接口的实现类,实例化这个ImportSelector,如果这个类也是DeferredImportSelector接口的实现类,那么加入ConfigurationClassParser的deferredImportSelectors属性中让第7步处理。否则调用ImportSelector的selectImports方法得到需要Import的类,然后对这些类递归做@Import注解的处理
如果这个类是ImportBeanDefinitionRegistrar接口的实现类,设置到配置类的importBeanDefinitionRegistrars属性中
其它情况下把这个类入队到ConfigurationClassParser的importStack(队列)属性中,然后把这个类当成是@Configuration注解修饰的类递归重头开始解析这个类
5 处理@ImportResource注解:获取@ImportResource注解的locations属性,得到资源文件的地址信息。然后遍历这些资源文件并把它们添加到配置类的importedResources属性中
6 处理@Bean注解:获取被@Bean注解修饰的方法,然后添加到配置类的beanMethods属性中
7 处理DeferredImportSelector:处理第3步@Import注解产生的DeferredImportSelector,进行selectImports方法的调用找出需要import的类,然后再调用第3步相同的处理逻辑处理
1
2
3
4
5
6
7
8
9
10
11
12
13
14
15
16
17
18
19
20
21
22
23
24
25
26
27
28
29
30
31
32
33
34
35
36
37
38
39
40
41
42
43
44
45
46
47
48
49
50
51
52
53
54
55
56
57
58
59
60
61
62
63
64
65
66
67
68
69
70
71
72
73
74
75
76
77
78
79
80
81
82
83
84
85
86
87
88
89
90
91
92
93
94
95
96
97
98
99
100
101
102
103
104
105
106
107
108
109
110
111
112
113
114
115
116
117
118
119
120
121
122
123
124
125
126
127
128
129
130
131
132
133
134
135
136
137public void processConfigBeanDefinitions(BeanDefinitionRegistry registry) {
List<BeanDefinitionHolder> configCandidates = new ArrayList<>();
/* 获得所有的BeanDefinition的Name,放入candidateNames数组
目前6个:
ConfigurationClassPostProcessor
AutowiredAnnotationBeanPostProcessor
CommonAnnotationBeanPostProcessor
EventListenerMethodProcessor
DefaultEventListenerFactory
appconfig
*/
String[] candidateNames = registry.getBeanDefinitionNames();
//循环candidateNames数组
for (String beanName : candidateNames) {
//根据beanName获得BeanDefinition
BeanDefinition beanDef = registry.getBeanDefinition(beanName);
/* 内部有两个标记位来标记是否已经处理过了
这里会引发一连串知识盲点
当我们注册配置类的时候,可以不加Configuration注解,
直接使用Component ComponentScan Import ImportResource注解,称之为Lite配置类
如果加了Configuration注解,就称之为Full配置类
如果我们注册了Lite配置类,我们getBean这个配置类,会发现它就是原本的那个配置类
如果我们注册了Full配置类,我们getBean这个配置类,会发现它已经不是原本那个配置类了,而是已经被cgilb代理的类了
写一个A类,其中有一个构造方法,打印出“你好”
再写一个配置类,里面有两个bean注解的方法
其中一个方法new了A 类,并且返回A的对象,把此方法称之为getA
第二个方法又调用了getA方法
如果配置类是Lite配置类,会发现打印了两次“你好”,也就是说A类被new了两次
如果配置类是Full配置类,会发现只打印了一次“你好”,也就是说A类只被new了一次,因为这个类被cgilb代理了,方法已经被改写
*/
if (beanDef.getAttribute(ConfigurationClassUtils.CONFIGURATION_CLASS_ATTRIBUTE) != null) {
if (logger.isDebugEnabled()) {
logger.debug("Bean definition has already been processed as a configuration class: " + beanDef);
}
}
/* 判断是否为配置类(有两种情况 一种是传统意义上的配置类,一种是普通的bean),
在这个方法内部,会做判断,这个配置类是Full配置类,还是Lite配置类,并且做上标记
满足条件,加入到configCandidates */
else if (ConfigurationClassUtils.checkConfigurationClassCandidate(beanDef, this.metadataReaderFactory)) {
configCandidates.add(new BeanDefinitionHolder(beanDef, beanName));
}
}
// 如果没有配置类,直接返回
// Return immediately if no @Configuration classes were found
if (configCandidates.isEmpty()) {
return;
}
//处理排序
// Sort by previously determined @Order value, if applicable
configCandidates.sort((bd1, bd2) -> {
int i1 = ConfigurationClassUtils.getOrder(bd1.getBeanDefinition());
int i2 = ConfigurationClassUtils.getOrder(bd2.getBeanDefinition());
return Integer.compare(i1, i2);
});
// Detect any custom bean name generation strategy supplied through the enclosing application context
SingletonBeanRegistry sbr = null;
// DefaultListableBeanFactory最终会实现SingletonBeanRegistry接口,所以可以进入到这个if
if (registry instanceof SingletonBeanRegistry) {
sbr = (SingletonBeanRegistry) registry;
if (!this.localBeanNameGeneratorSet) {
//spring中可以修改默认的bean命名方式,这里就是看用户有没有自定义bean命名方式,虽然一般没有人会这么做
BeanNameGenerator generator = (BeanNameGenerator) sbr.getSingleton(
AnnotationConfigUtils.CONFIGURATION_BEAN_NAME_GENERATOR);
if (generator != null) {
this.componentScanBeanNameGenerator = generator;
this.importBeanNameGenerator = generator;
}
}
}
if (this.environment == null) {
this.environment = new StandardEnvironment();
}
// Parse each @Configuration class
ConfigurationClassParser parser = new ConfigurationClassParser(
this.metadataReaderFactory, this.problemReporter, this.environment,
this.resourceLoader, this.componentScanBeanNameGenerator, registry);
Set<BeanDefinitionHolder> candidates = new LinkedHashSet<>(configCandidates);
Set<ConfigurationClass> alreadyParsed = new HashSet<>(configCandidates.size());
do {
//解析配置类(传统意义上的配置类或者是普通bean,核心来了) candidates 仅appConfig类
parser.parse(candidates);
parser.validate();
Set<ConfigurationClass> configClasses = new LinkedHashSet<>(parser.getConfigurationClasses());
configClasses.removeAll(alreadyParsed);
// Read the model and create bean definitions based on its content
if (this.reader == null) {
this.reader = new ConfigurationClassBeanDefinitionReader(
registry, this.sourceExtractor, this.resourceLoader, this.environment,
this.importBeanNameGenerator, parser.getImportRegistry());
}
//直到这一步才把Import的类,@Bean @ImportRosource 转换成BeanDefinition
this.reader.loadBeanDefinitions(configClasses);
//把configClasses加入到alreadyParsed,代表
alreadyParsed.addAll(configClasses);
candidates.clear();
//获得注册器里面BeanDefinition的数量 和 candidateNames进行比较
//如果大于的话,说明有新的BeanDefinition注册进来了
if (registry.getBeanDefinitionCount() > candidateNames.length) {
String[] newCandidateNames = registry.getBeanDefinitionNames();
Set<String> oldCandidateNames = new HashSet<>(Arrays.asList(candidateNames));
Set<String> alreadyParsedClasses = new HashSet<>();
//循环alreadyParsed。把类名加入到alreadyParsedClasses
for (ConfigurationClass configurationClass : alreadyParsed) {
alreadyParsedClasses.add(configurationClass.getMetadata().getClassName());
}
for (String candidateName : newCandidateNames) {
if (!oldCandidateNames.contains(candidateName)) {
BeanDefinition bd = registry.getBeanDefinition(candidateName);
if (ConfigurationClassUtils.checkConfigurationClassCandidate(bd, this.metadataReaderFactory) &&
!alreadyParsedClasses.contains(bd.getBeanClassName())) {
candidates.add(new BeanDefinitionHolder(bd, candidateName));
}
}
}
candidateNames = newCandidateNames;
}
}
while (!candidates.isEmpty());
// Register the ImportRegistry as a bean in order to support ImportAware @Configuration classes
if (sbr != null && !sbr.containsSingleton(IMPORT_REGISTRY_BEAN_NAME)) {
sbr.registerSingleton(IMPORT_REGISTRY_BEAN_NAME, parser.getImportRegistry());
}
if (this.metadataReaderFactory instanceof CachingMetadataReaderFactory) {
// Clear cache in externally provided MetadataReaderFactory; this is a no-op
// for a shared cache since it'll be cleared by the ApplicationContext.
((CachingMetadataReaderFactory) this.metadataReaderFactory).clearCache();
}
}- ConfigurationClassParser.parse方法
1
2
3
4
5
6
7
8
9
10
11
12
13
14
15
16
17
18
19
20
21
22
23
24
25
26
27
28
29
30
31
32
33
34
35
36
37
38
39
40
41
42
43
44
45
46
47
48
49
50
51
52
53
54
55
56
57
58
59
60
61
62
63
64
65
66
67
68
69
70
71
72
73
74
75
76
77
78
79
80
81
82
83
84
85
86
87
88
89
90
91
92
93
94
95
96
97
98
99
100
101
102
103
104
105
106
107
108
109
110
111
112
113
114
115
116
117
118
119
120
121
122
123
124
125
126
127
128
129
130
131
132
133
134
135
136
137
138
139
140
141
142
143
144
145
146
147
148
149
150
151
152
153
154
155
156
157
158
159
160
161
162
163
164
165
166
167
168
169
170
171
172public void parse(Set<BeanDefinitionHolder> configCandidates) {
//循环传进来的配置类
for (BeanDefinitionHolder holder : configCandidates) {
BeanDefinition bd = holder.getBeanDefinition();
try {
//如果获得BeanDefinition是AnnotatedBeanDefinition的实例
if (bd instanceof AnnotatedBeanDefinition) {
parse(((AnnotatedBeanDefinition) bd).getMetadata(), holder.getBeanName());
}
else if (bd instanceof AbstractBeanDefinition && ((AbstractBeanDefinition) bd).hasBeanClass()) {
parse(((AbstractBeanDefinition) bd).getBeanClass(), holder.getBeanName());
}
else {
parse(bd.getBeanClassName(), holder.getBeanName());
}
}
catch (BeanDefinitionStoreException ex) {
throw ex;
}
catch (Throwable ex) {
throw new BeanDefinitionStoreException(
"Failed to parse configuration class [" + bd.getBeanClassName() + "]", ex);
}
}
//执行DeferredImportSelector
this.deferredImportSelectorHandler.process();
}
protected final void parse(AnnotationMetadata metadata, String beanName) throws IOException {
processConfigurationClass(new ConfigurationClass(metadata, beanName), DEFAULT_EXCLUSION_FILTER);
}
protected void processConfigurationClass(ConfigurationClass configClass, Predicate<String> filter) throws IOException {
//判断是否需要跳过
if (this.conditionEvaluator.shouldSkip(configClass.getMetadata(), ConfigurationPhase.PARSE_CONFIGURATION)) {
return;
}
ConfigurationClass existingClass = this.configurationClasses.get(configClass);
if (existingClass != null) {
if (configClass.isImported()) {
if (existingClass.isImported()) {
existingClass.mergeImportedBy(configClass);
}
// Otherwise ignore new imported config class; existing non-imported class overrides it.
return;
}
else {
// Explicit bean definition found, probably replacing an import.
// Let's remove the old one and go with the new one.
this.configurationClasses.remove(configClass);
this.knownSuperclasses.values().removeIf(configClass::equals);
}
}
// Recursively process the configuration class and its superclass hierarchy.
SourceClass sourceClass = asSourceClass(configClass, filter);
do {
sourceClass = doProcessConfigurationClass(configClass, sourceClass, filter);
}
while (sourceClass != null);
this.configurationClasses.put(configClass, configClass);
}
/**
* Apply processing and build a complete {@link ConfigurationClass} by reading the
* annotations, members and methods from the source class. This method can be called
* multiple times as relevant sources are discovered.
* @param configClass the configuration class being build
* @param sourceClass a source class
* @return the superclass, or {@code null} if none found or previously processed
*/
@Nullable
protected final SourceClass doProcessConfigurationClass(
ConfigurationClass configClass, SourceClass sourceClass, Predicate<String> filter)
throws IOException {
if (configClass.getMetadata().isAnnotated(Component.class.getName())) {
// Recursively process any member (nested) classes first
//递归处理内部类,一般不会写内部类
processMemberClasses(configClass, sourceClass, filter);
}
// Process any @PropertySource annotations
//处理@PropertySource注解,@PropertySource注解用来加载properties文件
for (AnnotationAttributes propertySource : AnnotationConfigUtils.attributesForRepeatable(
sourceClass.getMetadata(), PropertySources.class,
org.springframework.context.annotation.PropertySource.class)) {
if (this.environment instanceof ConfigurableEnvironment) {
processPropertySource(propertySource);
}
else {
logger.info("Ignoring @PropertySource annotation on [" + sourceClass.getMetadata().getClassName() +
"]. Reason: Environment must implement ConfigurableEnvironment");
}
}
// Process any @ComponentScan annotations
//获得ComponentScan注解具体的内容,ComponentScan注解除了最常用的basePackage之外,还有includeFilters,excludeFilters等
Set<AnnotationAttributes> componentScans = AnnotationConfigUtils.attributesForRepeatable(
sourceClass.getMetadata(), ComponentScans.class, ComponentScan.class);
//如果没有打上ComponentScan,或者被@Condition条件跳过,就不再进入这个if
if (!componentScans.isEmpty() &&
!this.conditionEvaluator.shouldSkip(sourceClass.getMetadata(), ConfigurationPhase.REGISTER_BEAN)) {
//循环处理componentScans
for (AnnotationAttributes componentScan : componentScans) {
// The config class is annotated with @ComponentScan -> perform the scan immediately
//componentScan就是@ComponentScan上的具体内容,sourceClass.getMetadata().getClassName()就是配置类的名称
Set<BeanDefinitionHolder> scannedBeanDefinitions =
this.componentScanParser.parse(componentScan, sourceClass.getMetadata().getClassName());
// Check the set of scanned definitions for any further config classes and parse recursively if needed
for (BeanDefinitionHolder holder : scannedBeanDefinitions) {
BeanDefinition bdCand = holder.getBeanDefinition().getOriginatingBeanDefinition();
if (bdCand == null) {
bdCand = holder.getBeanDefinition();
}
if (ConfigurationClassUtils.checkConfigurationClassCandidate(bdCand, this.metadataReaderFactory)) {
//递归调用,因为可能组件类有被@Bean标记的方法,或者组件类本身也有ComponentScan等注解
parse(bdCand.getBeanClassName(), holder.getBeanName());
}
}
}
}
//处理@Import注解
//@Import注解是spring中很重要的一个注解,Springboot大量应用这个注解
//@Import三种类,一种是Import普通类,一种是Import ImportSelector,还有一种是Import ImportBeanDefinitionRegistrar
//getImports(sourceClass)是获得import的内容,返回的是一个set
// Process any @Import annotations
processImports(configClass, sourceClass, getImports(sourceClass), filter, true);
// Process any @ImportResource annotations
//处理@ImportResource注解
AnnotationAttributes importResource =
AnnotationConfigUtils.attributesFor(sourceClass.getMetadata(), ImportResource.class);
if (importResource != null) {
String[] resources = importResource.getStringArray("locations");
Class<? extends BeanDefinitionReader> readerClass = importResource.getClass("reader");
for (String resource : resources) {
String resolvedResource = this.environment.resolveRequiredPlaceholders(resource);
configClass.addImportedResource(resolvedResource, readerClass);
}
}
//处理@Bean的方法,可以看到获得了带有@Bean的方法后,不是马上转换成BeanDefinition,而是先用一个set接收
// Process individual @Bean methods
Set<MethodMetadata> beanMethods = retrieveBeanMethodMetadata(sourceClass);
for (MethodMetadata methodMetadata : beanMethods) {
configClass.addBeanMethod(new BeanMethod(methodMetadata, configClass));
}
// Process default methods on interfaces
processInterfaces(configClass, sourceClass);
// Process superclass, if any
if (sourceClass.getMetadata().hasSuperClass()) {
String superclass = sourceClass.getMetadata().getSuperClassName();
if (superclass != null && !superclass.startsWith("java") &&
!this.knownSuperclasses.containsKey(superclass)) {
this.knownSuperclasses.put(superclass, configClass);
// Superclass found, return its annotation metadata and recurse
return sourceClass.getSuperClass();
}
}
// No superclass -> processing is complete
return null;
}
AutowiredAnnotationBeanPostProcessor

* AutowiredAnnotationBeanPostProcessor 将扫描 Spring 容器中所有 Bean,当发现 Bean 中拥有@Autowired 注释时就找到和其匹配(默认按类型匹配)的 Bean,并注入到对应的地方中去。
* 关于作用后续内容会说到
CommonAnnotationBeanPostProcessor

* CommonAnnotationBeanPostProcessor类在spring中是一个极其重要的类,它负责解析@Resource、@WebServiceRef、@EJB三个注解。这三个注解都是定义在javax.*包下的注解,属于java中的注解
* 关于作用后续内容会说到
PersistenceAnnotationBeanPostProcessor

* PersistenceAnnotationBeanPostProcessor是Spring提供的用于处理注解@PersistenceUnit和@PersistenceContext的BeanPostProcessor。用于注入相应的JPA资源:EntityManagerFactory和EntityManager (或者它们的子类变量)。
* 关于作用后续内容会说到
EventListenerMethodProcessor

* EventListenerMethodProcessor 是 Spring 事件机制中非常重要的一个组件。它管理了一组EventListenerFactory组件,用来将应用中每个使用@EventListener注解定义的事件监听方法变成一个ApplicationListener实例注册到容器。换句话讲,框架开发者,或者应用开发者使用注解@EventListener定义的事件处理方法,如果没有EventListenerMethodProcessor的发现和注册,是不会被容器看到和使用的。
* 关于作用后续内容会说到
DefaultEventListenerFactory

* 监听器工厂
* 关于作用后续内容会说到
registerPostProcessor 方法
registerPostProcessor方法内部就是注册Bean,1
2
3
4
5
6
7
8
9
10private static BeanDefinitionHolder registerPostProcessor(
BeanDefinitionRegistry registry, RootBeanDefinition definition, String beanName) {
//为BeanDefinition设置了一个Role,ROLE_INFRASTRUCTURE代表这是spring内部的,并非用户定义的
definition.setRole(BeanDefinition.ROLE_INFRASTRUCTURE);
//BeanDefinitionRegistry是接口,实现类:AnnotationConfigApplicationContext 实现方法位于:GenericApplicationContext
//方法实现this.beanFactory.registerBeanDefinition(beanName, beanDefinition);
registry.registerBeanDefinition(beanName, definition);
return new BeanDefinitionHolder(definition, beanName);
}
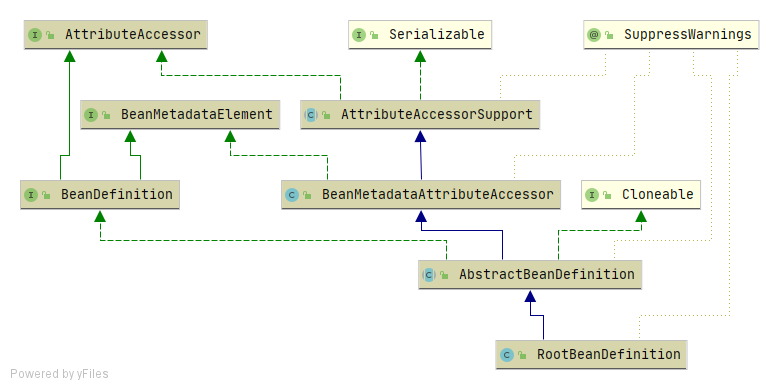
- RootBeanDefinition 是BeanDefinition接口子类
BeanDefinition是什么,顾名思义,它是用来描述Bean的,- 里面存放着关于Bean的一系列信息,比如Bean的作用域,Bean所对应的Class,
- 是否懒加载,是否Primary等等,这个BeanDefinition也相当重要,
至此,实例化AnnotatedBeanDefinitionReader reader分析完毕。
初始化扫描器
this.scanner = new ClassPathBeanDefinitionScanner(this);
register(componentClasses);
- 把传入的类进行注册,这里有两个情况,
- 传入传统的配置类
- 传入bean(虽然一般没有人会这么做
- 看到后面会知道spring把传统的带上@Configuration的配置类称之为FULL配置类,不带@Configuration的称之为Lite配置类
- 但是我们这里先把带上@Configuration的配置类称之为传统配置类,不带的称之为普通bean
1 | @Override |
AnnotatedBeanDefinitionReader 类register 方法
1 | //componentClasses= AppConfig.class |
AnnotatedBeanDefinitionReader 类 registerBean方法
public void registerBean(Class<?> beanClass) {
doRegisterBean(beanClass, null, null, null, null);
}
AnnotatedBeanDefinitionReader的方法doRegisterBean
- 1 通过AnnotatedGenericBeanDefinition的构造方法,
获得配置类的BeanDefinition,这里是不是似曾相似,
在注册ConfigurationClassPostProcessor类的时候,
也是通过构造方法去获得BeanDefinition的,只不过当时是通过RootBeanDefinition去获得,
现在是通过AnnotatedGenericBeanDefinition去获得。 - 2 判断需不需要跳过注册,Spring中有一个@Condition注解,如果不满足条件,就会跳过这个类的注册。
- 3 然后是解析作用域,如果没有设置的话,默认为单例。
- 4 获得BeanName。
- 5 解析通用注解,填充到AnnotatedGenericBeanDefinition,解析的注解为Lazy,Primary,DependsOn,Role,Description。
- 6 限定符处理,不是特指@Qualifier注解,也有可能是Primary,或者是Lazy,或者是其他(理论上是任何注解,这里没有判断注解的有效性)。
- 7 把AnnotatedGenericBeanDefinition数据结构和beanName封装到一个对象中(这个不是很重要,可以简单的理解为方便传参)。
- 8 注册,最终会调用DefaultListableBeanFactory中的registerBeanDefinition方法去注册:
1 | //beanClass= AppConfig.class |
- AnnotatedGenericBeanDefinition
类注解初始化
refresh
Spring容器创建之后,会调用它的refresh方法刷新Spring应用的上下文。
prepareRefresh();
//刷新预处理,和主流程关系不大,就是保存了容器的启动时间,启动标志等1
2
3
4
5
6
7
8
9
10
11
12
13
14
15
16
17
18
19
20
21
22
23
24
25
26
27
28
29
30
31
32
33
34
35protected void prepareRefresh() {
// Switch to active.
this.startupDate = System.currentTimeMillis();
this.closed.set(false);
this.active.set(true);
if (logger.isDebugEnabled()) {
if (logger.isTraceEnabled()) {
logger.trace("Refreshing " + this);
}
else {
logger.debug("Refreshing " + getDisplayName());
}
}
// 空方法
initPropertySources();
// 验证环境信息里一些必须存在的属性
getEnvironment().validateRequiredProperties();
// Store pre-refresh ApplicationListeners...
if (this.earlyApplicationListeners == null) {
this.earlyApplicationListeners = new LinkedHashSet<>(this.applicationListeners);
}
else {
// Reset local application listeners to pre-refresh state.
this.applicationListeners.clear();
this.applicationListeners.addAll(this.earlyApplicationListeners);
}
// Allow for the collection of early ApplicationEvents,
// to be published once the multicaster is available...
this.earlyApplicationEvents = new LinkedHashSet<>();
}
ConfigurableListableBeanFactory beanFactory = obtainFreshBeanFactory();
获取AnnotationConfigApplicationContext 中
DefaultListableBeanFactory对象,DefaultListableBeanFactory是ConfigurableListableBeanFactory子类
prepareBeanFactory(beanFactory);
配置这个工厂的标准环境,比如context的类加载器和post-processors后处理器。1
2
3
4
5
6
7
8
9
10
11
12
13
14
15
16
17
18
19
20
21
22
23
24
25
26
27
28
29
30
31
32
33
34
35
36
37
38
39
40
41
42
43
44
45
46
47
48
49
50
51
52
53
54
55
56
57
58
59
60/**
* 设置了一个类加载器
* 设置了bean表达式解析器
* 添加了属性编辑器的支持
* 添加了一个后置处理器:ApplicationContextAwareProcessor,此后置处理器实现了BeanPostProcessor接口
* 设置了一些忽略自动装配的接口
* 设置了一些允许自动装配的接口,并且进行了赋值操作
* 在容器中还没有XX的bean的时候,帮我们注册beanName为XX的singleton bean
*/
protected void prepareBeanFactory(ConfigurableListableBeanFactory beanFactory) {
// Tell the internal bean factory to use the context's class loader etc.
//设置类加载器
beanFactory.setBeanClassLoader(getClassLoader());
//设置bean表达式解析器
beanFactory.setBeanExpressionResolver(new StandardBeanExpressionResolver(beanFactory.getBeanClassLoader()));
//属性编辑器支持
beanFactory.addPropertyEditorRegistrar(new ResourceEditorRegistrar(this, getEnvironment()));
//添加一个后置处理器:ApplicationContextAwareProcessor,此后置处理处理器实现了BeanPostProcessor接口
// Configure the bean factory with context callbacks.
beanFactory.addBeanPostProcessor(new ApplicationContextAwareProcessor(this));
//以下接口,忽略自动装配
beanFactory.ignoreDependencyInterface(EnvironmentAware.class);
beanFactory.ignoreDependencyInterface(EmbeddedValueResolverAware.class);
beanFactory.ignoreDependencyInterface(ResourceLoaderAware.class);
beanFactory.ignoreDependencyInterface(ApplicationEventPublisherAware.class);
beanFactory.ignoreDependencyInterface(MessageSourceAware.class);
beanFactory.ignoreDependencyInterface(ApplicationContextAware.class);
//以下接口,允许自动装配,第一个参数是自动装配的类型,,第二个字段是自动装配的值
// BeanFactory interface not registered as resolvable type in a plain factory.
// MessageSource registered (and found for autowiring) as a bean.
beanFactory.registerResolvableDependency(BeanFactory.class, beanFactory);
beanFactory.registerResolvableDependency(ResourceLoader.class, this);
beanFactory.registerResolvableDependency(ApplicationEventPublisher.class, this);
beanFactory.registerResolvableDependency(ApplicationContext.class, this);
//添加一个后置处理器:ApplicationListenerDetector,此后置处理器实现了BeanPostProcessor接口
// Register early post-processor for detecting inner beans as ApplicationListeners.
beanFactory.addBeanPostProcessor(new ApplicationListenerDetector(this));
// Detect a LoadTimeWeaver and prepare for weaving, if found.
if (beanFactory.containsBean(LOAD_TIME_WEAVER_BEAN_NAME)) {
beanFactory.addBeanPostProcessor(new LoadTimeWeaverAwareProcessor(beanFactory));
// Set a temporary ClassLoader for type matching.
beanFactory.setTempClassLoader(new ContextTypeMatchClassLoader(beanFactory.getBeanClassLoader()));
}
//如果没有注册过bean名称为XXX,spring就自己创建一个名称为XXX的singleton bean
// 注册环境变量
if (!beanFactory.containsLocalBean(ENVIRONMENT_BEAN_NAME)) {
beanFactory.registerSingleton(ENVIRONMENT_BEAN_NAME, getEnvironment());
}
if (!beanFactory.containsLocalBean(SYSTEM_PROPERTIES_BEAN_NAME)) {
beanFactory.registerSingleton(SYSTEM_PROPERTIES_BEAN_NAME, getEnvironment().getSystemProperties());
}
if (!beanFactory.containsLocalBean(SYSTEM_ENVIRONMENT_BEAN_NAME)) {
beanFactory.registerSingleton(SYSTEM_ENVIRONMENT_BEAN_NAME, getEnvironment().getSystemEnvironment());
}
}
ApplicationContextAwareProcessor
ApplicationContextAwareProcessor是一个Spring内部工具,它实现了接口BeanPostProcessor,用于向实现了如下某种Aware接口的bean设置ApplicationContext中相应的属性:- EnvironmentAware
- EmbeddedValueResolverAware
- ResourceLoaderAware
- ApplicationEventPublisherAware
- MessageSourceAware
- ApplicationContextAware
ApplicationContextAwareProcessor自己会被应用程序上下文自动注册到bean容器,不需要应用开发人员操心
后续内容会分析作用
ApplicationListenerDetector
1、在Bean初始化完成之后:如果Bean是单例的则并且bean instanceof ApplicationListener。加入到this.applicationListeners中。
2、在Bean销毁之前搞事情: 如果Bean是一个ApplicationListener,则会从ApplicationEventMulticaster(事件广播器)中提前删除了
后续内容会分析作用
- LoadTimeWeaverAwareProcessor
增加对 AspectJ 的支持
后续说到aop会详细说postProcessBeanFactory(beanFactory);
空方法invokeBeanFactoryPostProcessors(beanFactory);
在Spring容器中找出实现了BeanFactoryPostProcessor接口的processor并执行。Spring容器会委托给PostProcessorRegistrationDelegate的invokeBeanFactoryPostProcessors方法执行。1
2
3
4
5
6
7
8
9
10
11
12
13protected void invokeBeanFactoryPostProcessors(ConfigurableListableBeanFactory beanFactory) {
//spring允许我们手动添加BeanFactoryPostProcessor
//即:annotationConfigApplicationContext.addBeanFactoryPostProcessor(XXX);
//getBeanFactoryPostProcessors() 在外部可以手动添加一个后置处理器,而不是交给Spring去扫描
PostProcessorRegistrationDelegate.invokeBeanFactoryPostProcessors(beanFactory, getBeanFactoryPostProcessors());
// Detect a LoadTimeWeaver and prepare for weaving, if found in the meantime
// (e.g. through an @Bean method registered by ConfigurationClassPostProcessor)
if (beanFactory.getTempClassLoader() == null && beanFactory.containsBean(LOAD_TIME_WEAVER_BEAN_NAME)) {
beanFactory.addBeanPostProcessor(new LoadTimeWeaverAwareProcessor(beanFactory));
beanFactory.setTempClassLoader(new ContextTypeMatchClassLoader(beanFactory.getBeanClassLoader()));
}
}
PostProcessorRegistrationDelegate.invokeBeanFactoryPostProcessors方法
先介绍两个接口:
- BeanFactoryPostProcessor:用来修改Spring容器中已经存在的bean的定义,使用ConfigurableListableBeanFactory对bean进行处理
- BeanDefinitionRegistryPostProcessor:继承BeanFactoryPostProcessor,作用跟BeanFactoryPostProcessor一样,只不过是使用BeanDefinitionRegistry对bean进行处理
过程:
beanFactory是DefaultListableBeanFactory,是BeanDefinitionRegistry的实现类,所以肯定满足if
- 1 定义了一个Set(processedBeans),装载BeanName,后面会根据这个Set,来判断后置处理器是否被执行过了。
2 定义了两个List,
- 一个是regularPostProcessors,用来装载BeanFactoryPostProcessor
- 一个是registryProcessors用来装载BeanDefinitionRegistryPostProcessor,其中BeanDefinitionRegistryPostProcessor扩展了BeanFactoryPostProcessor;BeanDefinitionRegistryPostProcessor有两个方法,一个是独有的postProcessBeanDefinitionRegistry方法,一个是父类的postProcessBeanFactory方法。
3 循环传进来的beanFactoryPostProcessors,上面已经解释过了,一般情况下,这里永远都是空的,只有手动add beanFactoryPostProcessor,这里才会有数据。我们假设beanFactoryPostProcessors有数据,进入循环,判断postProcessor是不是BeanDefinitionRegistryPostProcessor,因为BeanDefinitionRegistryPostProcessor扩展了BeanFactoryPostProcessor,所以这里先要判断是不是BeanDefinitionRegistryPostProcessor,是的话,执行postProcessBeanDefinitionRegistry方法,然后把对象装到registryProcessors里面去,不是的话,就装到regularPostProcessors。
4 定义了一个临时变量:currentRegistryProcessors,用来装载BeanDefinitionRegistryPostProcessor。
5 getBeanNamesForType,顾名思义,是根据类型查到BeanNames,这里有一点需要注意,就是去哪里找,点开这个方法的话,就知道是循环beanDefinitionNames去找,这个方法以后也会经常看到。这里传了BeanDefinitionRegistryPostProcessor.class,就是找到类型为BeanDefinitionRegistryPostProcessor的后置处理器,并且赋值给postProcessorNames。一般情况下,只会找到一个,就是org.springframework.context.annotation.internalConfigurationAnnotationProcessor,也就是ConfigurationAnnotationProcessor。这里有一个问题,为什么我自己写了个类,实现了BeanDefinitionRegistryPostProcessor接口,也打上了@Component注解,但是这里没有获得,因为直到这一步,Spring还没有完成扫描,扫描是在ConfigurationClassPostProcessor类中完成的,也就是下面第一个invokeBeanDefinitionRegistryPostProcessors方法。
6 循环postProcessorNames,其实也就是org.springframework.context.annotation.internalConfigurationAnnotationProcessor,
- 判断此后置处理器是否实现了PriorityOrdered接口(ConfigurationAnnotationProcessor也实现了PriorityOrdered接口),如果实现了,把它添加到currentRegistryProcessors这个临时变量中,再放入processedBeans,代表这个后置处理已经被处理过了(当然现在还没有处理,但是马上就要处理了)
- 7 进行排序,PriorityOrdered是一个排序接口,如果实现了它,就说明此后置处理器是有顺序的,所以需要排序。当然目前这里只有一个后置处理器,就是ConfigurationClassPostProcessor。
- 8 把currentRegistryProcessors合并到registryProcessors,为什么需要合并?因为一开始spring只会执行BeanDefinitionRegistryPostProcessor独有的方法,而不会执行BeanDefinitionRegistryPostProcessor父类的方法,即BeanFactoryProcessor接口中的方法,所以需要把这些后置处理器放入一个集合中,后续统一执行BeanFactoryProcessor接口中的方法。当然目前这里只有一个后置处理器,就是ConfigurationClassPostProcessor。
- 9 可以理解为执行currentRegistryProcessors中的ConfigurationClassPostProcessor中的postProcessBeanDefinitionRegistry方法,这就是Spring设计思想的体现了,在这里体现的就是其中的热插拔,插件化开发的思想。Spring中很多东西都是交给插件去处理的,这个后置处理器就相当于一个插件,如果不想用了,直接不添加就是了。这个方法特别重要,我们后面会详细说来。
- 10 清空currentRegistryProcessors,因为currentRegistryProcessors是一个临时变量,已经完成了目前的使命,所以需要清空,当然后面还会用到。
- 11 再次根据BeanDefinitionRegistryPostProcessor获得BeanName,然后进行循环,看这个后置处理器是否被执行过了,如果没有被执行过,也实现了Ordered接口的话,把此后置处理器推送到currentRegistryProcessors和processedBeans中。这里就可以获得我们定义的,并且打上@Component注解的后置处理器了,因为Spring已经完成了扫描,但是这里需要注意的是,由于ConfigurationClassPostProcessor在上面已经被执行过了,所以虽然可以通过getBeanNamesForType获得,但是并不会加入到currentRegistryProcessors和processedBeans。
- 12 处理排序。
- 13 合并Processors,合并的理由和上面是一样的。
- 14 执行我们自定义的BeanDefinitionRegistryPostProcessor的postProcessBeanDefinitionRegistry方法。
- 15 清空临时变量。
- 16 在上面的方法中,仅仅是执行了实现了Ordered接口的BeanDefinitionRegistryPostProcessor,这里是执行没有实现Ordered接口的BeanDefinitionRegistryPostProcessor的postProcessBeanDefinitionRegistry方法。
- 17 regularPostProcessors装载BeanFactoryPostProcessor,执行BeanFactoryPostProcessor的postProcessBeanFactory方法
- 18 regularPostProcessors一般情况下,是不会有数据的,只有在外面手动添加BeanFactoryPostProcessor,才会有数据
- 19 查找实现了BeanFactoryPostProcessor的后置处理器,并且执行后置处理器中的方法。和上面的逻辑差不多,不再详细说明。
1
2
3
4
5
6
7
8
9
10
11
12
13
14
15
16
17
18
19
20
21
22
23
24
25
26
27
28
29
30
31
32
33
34
35
36
37
38
39
40
41
42
43
44
45
46
47
48
49
50
51
52
53
54
55
56
57
58
59
60
61
62
63
64
65
66
67
68
69
70
71
72
73
74
75
76
77
78
79
80
81
82
83
84
85
86
87
88
89
90
91
92
93
94
95
96
97
98
99
100
101
102
103
104
105
106
107
108
109
110
111
112
113
114
115
116
117
118
119
120
121
122
123
124
125
126
127
128
129
130
131
132
133
134
135
136
137
138
139
140
141
142
143
144
145
146
147
148
149
150
151
152
153
154
155
156
157
158
159
160
161
162
163
164
165
166
167
168
169
170
171
172
173
174
175
176
177
178
179
180
181
182
183
184
185
186
187
188
189
190
191
192
193
194
195
196
197
198//beanFactory=DefaultListableBeanFactory
//beanFactoryPostProcessors 没有添加 所以size=0
public static void invokeBeanFactoryPostProcessors(
ConfigurableListableBeanFactory beanFactory, List<BeanFactoryPostProcessor> beanFactoryPostProcessors) {
// Invoke BeanDefinitionRegistryPostProcessors first, if any.
Set<String> processedBeans = new HashSet<>();
//beanFactory是DefaultListableBeanFactory,是BeanDefinitionRegistry的实现类,所以肯定满足if
if (beanFactory instanceof BeanDefinitionRegistry) {
BeanDefinitionRegistry registry = (BeanDefinitionRegistry) beanFactory;
//regularPostProcessors 用来存放BeanFactoryPostProcessor,
List<BeanFactoryPostProcessor> regularPostProcessors = new ArrayList<>();
//registryProcessors 用来存放BeanDefinitionRegistryPostProcessor,BeanDefinitionRegistryPostProcessor扩展了BeanFactoryPostProcessor
List<BeanDefinitionRegistryPostProcessor> registryProcessors = new ArrayList<>();
/*
循环传进来的beanFactoryPostProcessors,正常情况下,beanFactoryPostProcessors肯定没有数据
因为beanFactoryPostProcessors是获得手动添加的,而不是spring扫描的
只有手动调用annotationConfigApplicationContext.addBeanFactoryPostProcessor(XXX)才会有数据
*/
for (BeanFactoryPostProcessor postProcessor : beanFactoryPostProcessors) {
/* 判断postProcessor是不是BeanDefinitionRegistryPostProcessor,因为BeanDefinitionRegistryPostProcessor
扩展了BeanFactoryPostProcessor,所以这里先要判断是不是BeanDefinitionRegistryPostProcessor
是的话,直接执行postProcessBeanDefinitionRegistry方法,然后把对象装到registryProcessors里面去
*/
if (postProcessor instanceof BeanDefinitionRegistryPostProcessor) {
BeanDefinitionRegistryPostProcessor registryProcessor =
(BeanDefinitionRegistryPostProcessor) postProcessor;
registryProcessor.postProcessBeanDefinitionRegistry(registry);
registryProcessors.add(registryProcessor);
}
else {
regularPostProcessors.add(postProcessor);
}
}
// Do not initialize FactoryBeans here: We need to leave all regular beans
// uninitialized to let the bean factory post-processors apply to them!
// Separate between BeanDefinitionRegistryPostProcessors that implement
// PriorityOrdered, Ordered, and the rest.
/* 一个临时变量,用来装载BeanDefinitionRegistryPostProcessor
BeanDefinitionRegistry继承了PostProcessorBeanFactoryPostProcessor
*/
List<BeanDefinitionRegistryPostProcessor> currentRegistryProcessors = new ArrayList<>();
// First, invoke the BeanDefinitionRegistryPostProcessors that implement PriorityOrdered.
/*
获得实现BeanDefinitionRegistryPostProcessor接口的类的BeanName:org.springframework.context.annotation.internalConfigurationAnnotationProcessor
对象是:ConfigurationClassPostProcessor
*/
String[] postProcessorNames =
beanFactory.getBeanNamesForType(BeanDefinitionRegistryPostProcessor.class, true, false);
for (String ppName : postProcessorNames) {
if (beanFactory.isTypeMatch(ppName, PriorityOrdered.class)) {
/*
获得ConfigurationClassPostProcessor类,并且放到currentRegistryProcessors
ConfigurationClassPostProcessor是很重要的一个类,它实现了BeanDefinitionRegistryPostProcessor接口
BeanDefinitionRegistryPostProcessor接口又实现了BeanFactoryPostProcessor接口
ConfigurationClassPostProcessor是极其重要的类
里面执行了扫描Bean,Import,ImportResouce等各种操作
用来处理配置类(有两种情况 一种是传统意义上的配置类,一种是普通的bean)的各种逻辑
*/
currentRegistryProcessors.add(beanFactory.getBean(ppName, BeanDefinitionRegistryPostProcessor.class));
//把name放到processedBeans,后续会根据这个集合来判断处理器是否已经被执行过了
processedBeans.add(ppName);
}
}
//处理排序
sortPostProcessors(currentRegistryProcessors, beanFactory);
/* 合并Processors,为什么要合并,因为registryProcessors是装载BeanDefinitionRegistryPostProcessor的
一开始的时候,spring只会执行BeanDefinitionRegistryPostProcessor独有的方法
而不会执行BeanDefinitionRegistryPostProcessor父类的方法,即BeanFactoryProcessor的方法
所以这里需要把处理器放入一个集合中,后续统一执行父类的方法
*/
registryProcessors.addAll(currentRegistryProcessors);
/*可以理解为执行ConfigurationClassPostProcessor的postProcessBeanDefinitionRegistry方法
Spring热插播的体现,像ConfigurationClassPostProcessor就相当于一个组件,Spring很多事情就是交给组件去管理
如果不想用这个组件,直接把注册组件的那一步去掉就可以
*/
invokeBeanDefinitionRegistryPostProcessors(currentRegistryProcessors, registry);
//因为currentRegistryProcessors是一个临时变量,所以需要清除
currentRegistryProcessors.clear();
// Next, invoke the BeanDefinitionRegistryPostProcessors that implement Ordered.
// 再次根据BeanDefinitionRegistryPostProcessor获得BeanName,看这个BeanName是否已经被执行过了,有没有实现Ordered接口
// 如果没有被执行过,也实现了Ordered接口的话,把对象推送到currentRegistryProcessors,名称推送到processedBeans
// 如果没有实现Ordered接口的话,这里不把数据加到currentRegistryProcessors,processedBeans中,后续再做处理
// 这里才可以获得我们定义的实现了BeanDefinitionRegistryPostProcessor的Bean
postProcessorNames = beanFactory.getBeanNamesForType(BeanDefinitionRegistryPostProcessor.class, true, false);
for (String ppName : postProcessorNames) {
if (!processedBeans.contains(ppName) && beanFactory.isTypeMatch(ppName, Ordered.class)) {
currentRegistryProcessors.add(beanFactory.getBean(ppName, BeanDefinitionRegistryPostProcessor.class));
processedBeans.add(ppName);
}
}
//处理排序
sortPostProcessors(currentRegistryProcessors, beanFactory);
//合并Processors
registryProcessors.addAll(currentRegistryProcessors);
//执行我们自定义的BeanDefinitionRegistryPostProcessor
invokeBeanDefinitionRegistryPostProcessors(currentRegistryProcessors, registry);
//清空临时变量
currentRegistryProcessors.clear();
// 上面的代码是执行了实现了Ordered接口的BeanDefinitionRegistryPostProcessor,
// 下面的代码就是执行没有实现Ordered接口的BeanDefinitionRegistryPostProcessor
// Finally, invoke all other BeanDefinitionRegistryPostProcessors until no further ones appear.
boolean reiterate = true;
while (reiterate) {
reiterate = false;
postProcessorNames = beanFactory.getBeanNamesForType(BeanDefinitionRegistryPostProcessor.class, true, false);
for (String ppName : postProcessorNames) {
if (!processedBeans.contains(ppName)) {
currentRegistryProcessors.add(beanFactory.getBean(ppName, BeanDefinitionRegistryPostProcessor.class));
processedBeans.add(ppName);
reiterate = true;
}
}
sortPostProcessors(currentRegistryProcessors, beanFactory);
registryProcessors.addAll(currentRegistryProcessors);
invokeBeanDefinitionRegistryPostProcessors(currentRegistryProcessors, registry);
currentRegistryProcessors.clear();
}
// Now, invoke the postProcessBeanFactory callback of all processors handled so far.
//registryProcessors集合装载BeanDefinitionRegistryPostProcessor
//上面的代码是执行子类独有的方法,这里需要再把父类的方法也执行一次
invokeBeanFactoryPostProcessors(registryProcessors, beanFactory);
//regularPostProcessors装载BeanFactoryPostProcessor,执行BeanFactoryPostProcessor的方法
//但是regularPostProcessors一般情况下,是不会有数据的,只有在外面手动添加BeanFactoryPostProcessor,才会有数据
invokeBeanFactoryPostProcessors(regularPostProcessors, beanFactory);
}
else {
// Invoke factory processors registered with the context instance.
invokeBeanFactoryPostProcessors(beanFactoryPostProcessors, beanFactory);
}
// Do not initialize FactoryBeans here: We need to leave all regular beans
// uninitialized to let the bean factory post-processors apply to them!
//找到BeanFactoryPostProcessor实现类的BeanName数组
String[] postProcessorNames =
beanFactory.getBeanNamesForType(BeanFactoryPostProcessor.class, true, false);
// Separate between BeanFactoryPostProcessors that implement PriorityOrdered,
// Ordered, and the rest.
List<BeanFactoryPostProcessor> priorityOrderedPostProcessors = new ArrayList<>();
List<String> orderedPostProcessorNames = new ArrayList<>();
List<String> nonOrderedPostProcessorNames = new ArrayList<>();
//循环BeanName数组
for (String ppName : postProcessorNames) {
//如果这个Bean被执行过了,跳过
if (processedBeans.contains(ppName)) {
// skip - already processed in first phase above
}
//如果实现了PriorityOrdered接口,加入到priorityOrderedPostProcessors
else if (beanFactory.isTypeMatch(ppName, PriorityOrdered.class)) {
priorityOrderedPostProcessors.add(beanFactory.getBean(ppName, BeanFactoryPostProcessor.class));
}
//如果实现了Ordered接口,加入到orderedPostProcessorNames
else if (beanFactory.isTypeMatch(ppName, Ordered.class)) {
orderedPostProcessorNames.add(ppName);
}
else {
//如果既没有实现PriorityOrdered,也没有实现Ordered。加入到nonOrderedPostProcessorNames
nonOrderedPostProcessorNames.add(ppName);
}
}
//排序处理priorityOrderedPostProcessors,即实现了PriorityOrdered接口的BeanFactoryPostProcessor
// First, invoke the BeanFactoryPostProcessors that implement PriorityOrdered.
sortPostProcessors(priorityOrderedPostProcessors, beanFactory);
//执行priorityOrderedPostProcessors
invokeBeanFactoryPostProcessors(priorityOrderedPostProcessors, beanFactory);
//执行实现了Ordered接口的BeanFactoryPostProcessor
// Next, invoke the BeanFactoryPostProcessors that implement Ordered.
List<BeanFactoryPostProcessor> orderedPostProcessors = new ArrayList<>(orderedPostProcessorNames.size());
for (String postProcessorName : orderedPostProcessorNames) {
orderedPostProcessors.add(beanFactory.getBean(postProcessorName, BeanFactoryPostProcessor.class));
}
sortPostProcessors(orderedPostProcessors, beanFactory);
invokeBeanFactoryPostProcessors(orderedPostProcessors, beanFactory);
// 执行既没有实现PriorityOrdered接口,也没有实现Ordered接口的BeanFactoryPostProcessor
// Finally, invoke all other BeanFactoryPostProcessors.
List<BeanFactoryPostProcessor> nonOrderedPostProcessors = new ArrayList<>(nonOrderedPostProcessorNames.size());
for (String postProcessorName : nonOrderedPostProcessorNames) {
nonOrderedPostProcessors.add(beanFactory.getBean(postProcessorName, BeanFactoryPostProcessor.class));
}
invokeBeanFactoryPostProcessors(nonOrderedPostProcessors, beanFactory);
// Clear cached merged bean definitions since the post-processors might have
// modified the original metadata, e.g. replacing placeholders in values...
beanFactory.clearMetadataCache();
}
ConfigurationClassPostProcessor.postProcessBeanDefinitionRegistry
/DefaultListableBeanFactory.png)
/AnnotationConfigApplicationContext.png)


/1.png)
/2.png)
/3.png)
/4.png)
/5.png)
/6.png)